Spotlight › Live USB and live CD
Boot it from a USB stick or a CD
os8088 has always shipped as floppy disk images, and almost nothing still has a floppy drive. Two new files close that gap: write one to a USB stick, or burn the other to a CD, and a real PC starts straight into the desktop with every program on drive C.
- drive C holds
- every program
- free to save into
- about 30MB
- needs
- legacy BIOS boot
What the two files are
One disk, two ways of handing it to a PC.
The problem they solve
os8088 boots off a floppy disk. That is the right answer for the machine it was written for -- an IBM PC from the early 1980s -- and the wrong answer for almost everything else. Plenty of later PCs will happily run software this old. Hardly any of them still have a floppy drive.
What those machines do have is the ability to start from a USB stick or from a CD.
os8088-usb.img
This is a raw hard-disk image: an exact copy of a complete 32MB disk, byte for byte, including the part at the very start that tells a PC how to boot it. You do not copy it onto a stick as a file. You write it over the stick, replacing everything that was there.
Once written, the stick is a bootable disk. A PC set to start from USB finds it and comes up at the os8088 desktop.
os8088.iso
This is the same 32MB image, wrapped inside a bootable CD. It is not a different build and it is not a cut-down one. Anything that runs from the stick runs from the CD.
What is on drive C
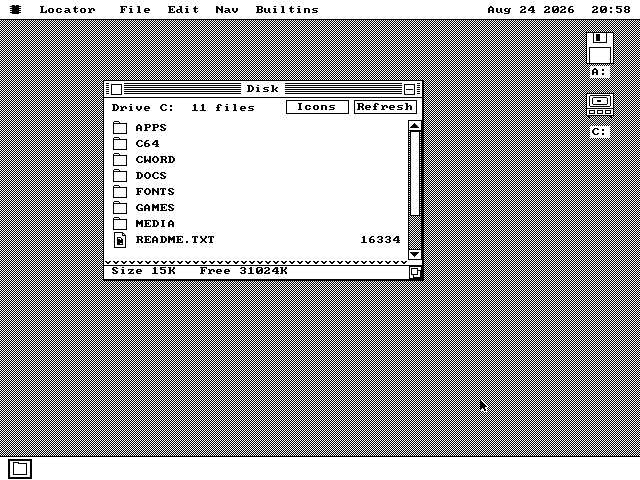
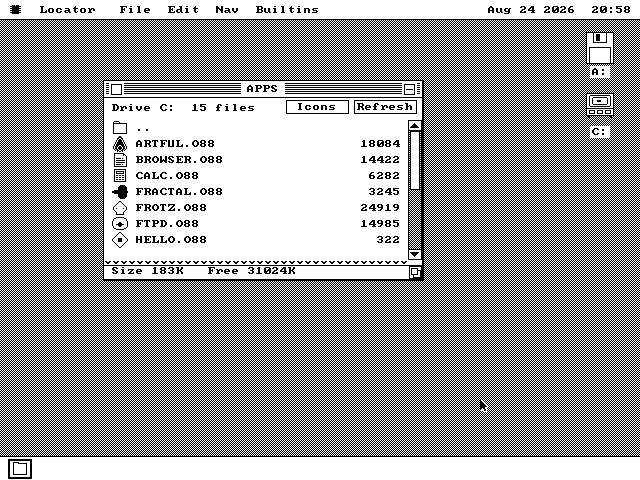
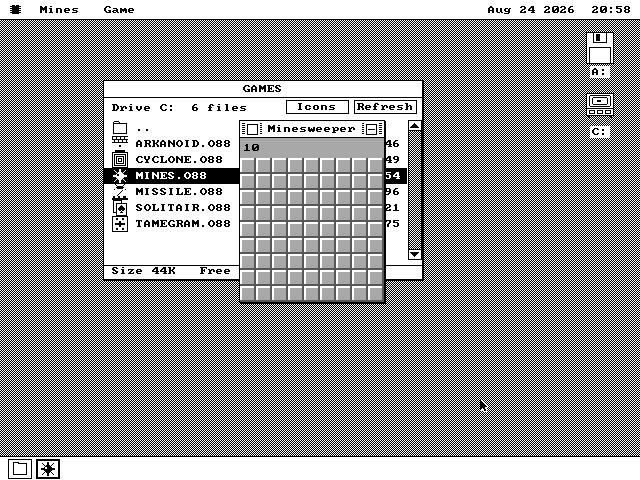
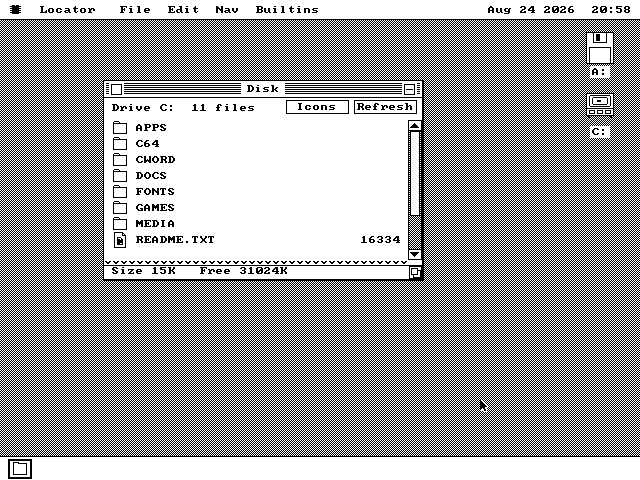
Everything. Both word processors, the text adventure story reader, the CP/M emulator, the Commodore 64 emulator, every game, every tool, the fonts and the sample documents. On floppies that is five or six disks to swap between. Here it is one drive, and about 30MB of it is still empty for your own files.
The floppy images have not gone away. They are still the way to run os8088 on the hardware it was written for, and a USB floppy drive or a Gotek -- a small device that pretends to be a floppy drive and reads disk images off a USB stick -- takes them happily.
See it running
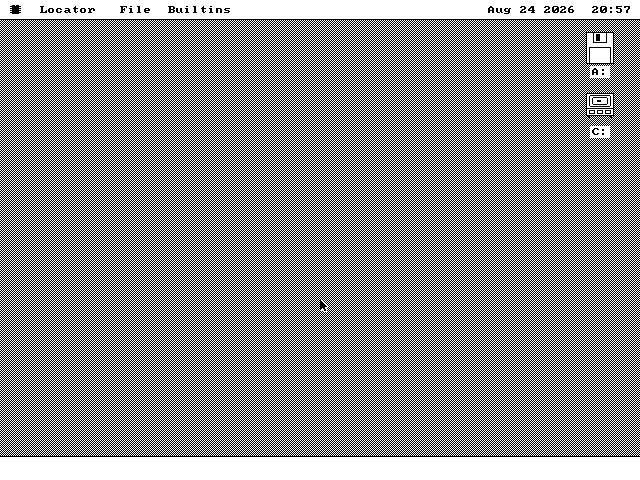
Every picture below is a real boot, from the image you would download.
How it works
No new code went into the operating system to make this happen.
It is an installed machine
os8088 could already install itself onto a hard disk and boot from it. The live media are that same disk, prepared by the build in advance instead of written by the installer on the day.
So a PC booted from the stick is, as far as every line of the operating system is concerned, an ordinary machine with os8088 installed on its hard disk. That is why this needed no new code: the path it takes was already there and already tested.
A PC shows it as a hard disk
When a PC boots from a USB stick in the old way, it presents the stick to the software as if it were a hard disk. Nothing running afterwards can tell the difference, and nothing running afterwards needs to.
os8088 has no idea USB exists, and it does not have to.
The disc pretends to be that same hard disk
A bootable CD can ask the PC to treat a disk image stored on it as if it were a hard disk. That is what this one does, and the image it names is the USB image itself, carried on the disc as an ordinary file.
The result is that no CD driver was needed anywhere. A driver for a kind of drive the target machine never shipped with would not have been worth the memory.
The same bytes every time
The images are built deterministically: the same source produces byte-for-byte identical files, every time, on any machine. Nothing in them varies with the clock or the folder they were built in.
That is what makes the checksum published with each release worth checking. If yours matches, your download is complete and unaltered.
What it will not do
Two of these will bite somebody, so they are worth reading before you start.
- The PC has to be able to boot the old way. That is legacy BIOS, the way PCs started before UEFI. Firmware that offers it usually calls it CSM, or Legacy Boot, or Compatibility Support Module, in a settings screen. A machine locked to UEFI will not start these images at all.
- A CD cannot save anything. The disc is read-only, so Control Panel settings and saved documents last until the machine is switched off. Nothing warns you in advance -- the save reports its error when you try it. Use the USB stick if you want to keep work.
- Writing the stick erases the stick. Completely, from the first byte. This is not copying a file onto it. Whatever was there is gone, and there is no undo.
- The images are built on demand. They carry the programs written in C, which need a compiler that the ordinary floppy build deliberately does not require. If you build from source, that is one extra step -- and the images in each release are already built.
Boot it yourself
In an emulator in a minute, or on real hardware in about ten.
In an emulator, first
Try it here before you go looking for a USB stick. Download the images from the releases page and give one to QEMU. The stick image:
qemu-system-i386 -drive file=os8088-usb.img,format=raw -boot c \
  -chardev msmouse,id=m0 -serial chardev:m0
Or the CD:
qemu-system-i386 -cdrom os8088.iso -boot d \
  -chardev msmouse,id=m0 -serial chardev:m0
The last line of each is the mouse. os8088 drives a serial mouse, and that is how QEMU gives it one.
On a real PC
-
Get the images and check them. Both files are in the release zip, with a checksum for every file beside them. Compare yours before you write anything.
-
Find a USB stick you can afford to lose. Writing the image destroys everything on it. Copy off anything you want to keep, and note the stick's size so you can recognise it in a moment.
-
Write the image. On a Mac, with the os8088 source checked out, there is a guided writer -- see below. On Windows, open the image in Rufus and choose DD image mode. On Linux or macOS by hand, with the stick unmounted:
dd if=os8088-usb.img of=/dev/sdX bs=1MReplace
/dev/sdXwith the stick's own device name, and check it twice. Getting this wrong overwrites the wrong disk. -
For a CD instead, burn the ISO as a disc image. Every burner has a command for this. Do not make a data disc with the ISO file sitting on it -- that produces a disc with one file on it and no way to boot.
-
Boot the PC from it. Plug the stick in, or put the disc in, and restart. Press the key that opens the boot menu as the machine starts -- usually F12, F11, F8 or Escape, and the screen normally says which. Pick the stick or the drive from the part of the list that is not marked UEFI.
-
If it is not offered, turn legacy booting on. Go into the firmware settings and look for CSM, Legacy Boot or Compatibility Support Module, and enable it. Then try the boot menu again.
The guided writer on a Mac
From an os8088 source checkout, make burn walks through the whole thing. It
is worth using even if you are comfortable with dd, for three reasons.
It only lists drives that could possibly be the right answer: on the USB bus, external, and never the disk your Mac is running from. Your internal drive is not shown with a warning beside it. It is not shown.
It makes you confirm by typing the disk's name rather than pressing y. Pressing y is
muscle memory. Typing disk4 is a decision.
And when it has finished writing, it reads the whole image back off the stick and compares checksums. A stick that quietly drops bytes -- fake-capacity flash is sold every day -- looks like a perfectly successful write and fails exactly that check. It burns the CD as well, when a burner is attached.